

Part one: Equipment

So, you want to try canning and preserving. By far the easiest method is water bath canning; but we should caution that easiest does not mean easy. All preserving will take a little time, a little patience and will make a bit of a mess. However, the final product will be worth it, we promise.
In part one we will cover the basic equipment that you will need to gather.
There are a lot of different ideas out there on what you absolutely NEED to start canning. Since this is about making the process as easy as possible we are going to recommend some things that most people will say are “luxury” or unnecessary. Trust us on this they are not a luxury.
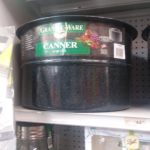
–A deep sauce pan, enamel Dutch oven (range top safe), or a water bath canner with lids. It needs to be deep enough to cover your jars.
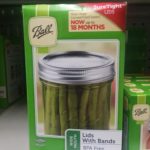
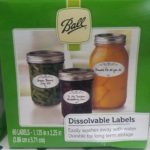
–Canning jars, these are sold by the half dozen, dozen, or single. You want the dozen. When new they come with new lids and rings. If you buy them used at a thrift store or borrowed from your mom you will need a new package of lids and rings. The jars are reusable, the lids are absolutely not.
– A canning rack. You can accomplish this in a different way. However, it is tricky to do so if you are new to the process. A canning rack makes it much easier to keep your jars properly submerged and upright in the water bath. If you have a baking rack that fits evenly across the bottom of your canner that will work as well.
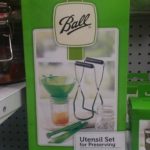
–A jar lifter. Do not believe anybody that tells you that you don’t need a jar lifter. This tool works like a hot pad works when you take things out of the oven. It keeps you from getting scalded, or burnt. Tongs are simply too slippery to do the job reliably.
–Wide mouth funnel. The mouth of the funnel should fit in the mouth of your jars, and remember that the liquid that you will be pouring into the jars is fairly viscous, so the widest mouth that fits is what you want.
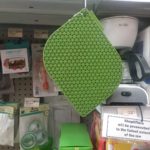
-Two towels. One can be something thick, you are just using it to protect your counter from heat and moisture. The second needs to be a flour sack. Flour sack towels are the best for wiping the lips of your jars to make sure that all the excess food is off of them and not leaving behind any towel lint. They are also usually very large and can be used as hot pads in a pinch. They also usually come in white. Buy them in white. Flour sacks stand up to bleaching really well, so that you know the towel touching your food is really clean.
–Measuring equipment. If you don’t own measuring cups and spoons yet, don’t start with canning as your first foray into the kitchen it will not end well. We have faith that you will get there, but try baking brownies or making pasta sauce first (we have those recipes as well). Then when you have your own cups/spoons come back to this.
–Scale. Yes, a lot of recipes these days have been converted for you. But, if you are using a heritage recipe it will most likely be in pounds and ounces. A scale will just make the process easier.
–Kitchen utensils such as spoons, hot pads, spatulas, ladles…see note above about measuring cups.
– A recipe. Let’s take a minute here and talk about recipes. Canning, like baking, is a science (cooking is an art form, but more on that in a different post). There are chemical changes occurring that make it work or make it disastrously not work. Most sites will tell you to only use a tested recipe from a trusted site like Ball jars, and if you are just starting out, we agree. However, as you get more comfortable venture on to heritage recipes. Look through your family’s cookbooks and recipes and most importantly as you modify recipes to your taste (more sugar, less sugar, allspice instead of cinnamon etc.) write it down. Remember that canning is science and you need to document successful experiments.
–Fresh produce. This is of course where it all begins and ends. You can preserve all sorts of things from fruit to meat to dandelions but most people, when they think of canning, are thinking about jam or jelly. We recommend starting with berries or plums they are easier to process than tomatoes or apples and you are more prone to have a successful first batch. A note of caution though, when we say fresh produce we mean picked within the last 24-32 hours. So pick it yourself, steal it from your friend’s garden box, or be the first one at the farmers market. Supermarket produce is really too old to can well by the time that you get it home. A side benefit of using produce from your own garden or trees is that you know what chemicals were or were not used on it.