


Part three: A simple recipe
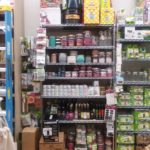
We have our basic canning supplies, and we have our jars ready to go. But what shall we put in them? This is a simple recipe that we found on https://www.simplycanning.com (Thanks Simply Canning for this great recipe!) In case you are wondering we are starting with a jam because they are easier and less time consuming than jelly. The difference is that jam uses the whole fruit which means a lot less straining. Jelly uses only the juice from the fruit and requires multiple straining steps before it can be finally put into cans.
Simple Strawberry Jam
-2qt strawberries crushed
-6 cups of sugar
-6 pint jars or 12 half pint jars.
-Gather your fruit. Remember what we said about the fresher the better. For this recipe you will need about 4 little green baskets worth of strawberries.
-Put a spoon in the freezer (a trick for later)
-Process your Strawberries. Wash them and core them. To core them you can use a strawberry corer, a tomato corer or a sharp paring knife. We like things easy and this recipe uses a tomato corer. Once they are clean and cored check for any bruised spots or wormholes, discard these portions. Note that you don’t have to get rid of the whole strawberry, just cut off the bad part and throw it away or compost it.
-Put your cored, cleaned berried in the stockpot that you will be cooking your jam in and get out a potato masher. Mash your berries, you want juice to start filling around the berries.
-Now measure the sugar. A note about sugar. You can make jelly and jam without sugar or with significantly less sugar. And we all know that processed sugar is bad for us. However, the fruit has to have something to help the jellying process and the sugar helps the natural pectin in the fruit do so. We will post other recipes with less sugar or no sugar that use store bought pectin, but this is an easy recipe and pectin is one more step that you don’t need on your first time out.
-Turn the heat on under your strawberries and slowly add your sugar stirring the whole time.
-Once the sugar is completely dissolved into the berries let your berries come to boil. You will boil the mix until it starts to thicken which could take up to an hour. You need to monitor this! Remember what we said about needing patience? This is where you need it. Once the jam just starts to thicken you need to stir constantly or it will burn to the bottom of the pan.
-Once it looks pretty thick (think thin gravy) get your frozen spoon and scoop up a little bit. The jam will cool rapidly and you will be able to instantly see if it is indeed thick enough. Tilt the spoon if it runs off in a sheet of liquid you are good to go. If it runs off like water you need to cook it longer. You could also invest in a candy/jelly thermometer and monitor temperature until the liquid reaches the jelling temp, but you need to be sure to compensate for your altitude. To find your jelling temp find the boiling point for your altitude and add 8 degrees. The thermometer goes right in the pot and when it reaches the jelling point you turn off the heat and remove the mixture from the hot burner.
-let it rest for a minute or two to allow more thickening. There should be a head of foam on top of the liquid, you can use a spoon or spatula to scrape this off the jam. You can eat it, but you can’t preserve it.
-Now you are going to process the jam. Remember those jars you should have had simmering in a pot? Pull one out of the pot, dump out the water in it and set it on your towel, put your funnel in the mouth of the jar. Using a ladle or a measuring cup pour some of the hot jam into the hot jar. Don’t just dump a funnel full of jam into the funnel, you have to leave at least ¼ inch of headroom in the jar for it to seal correctly, so don’t rush yourself!
-Wipe off any extra jam on the lip of the jar with your clean flour sack towel. Put a lid on the jar and then a ring. Tighten the ring as tight as you can with just your hand. Put the jar into the canning rack. Remember that the water is hot already so use your jar lifter to set the jar into the jar rack. Once you have filled a canning rack full let the jars boil for 10 minutes (15 if you are in Lake Tahoe or on top of Mt. Tam).
-Use your jar lifter and pull out your jars one by one. Set them on the towel that you put on your counter earlier. They are going to rest here for 24 hours. If you have more to process make sure that the jam has not cooled below the temp of the jars. Then simply repeat.